Five ways to find your creative flow

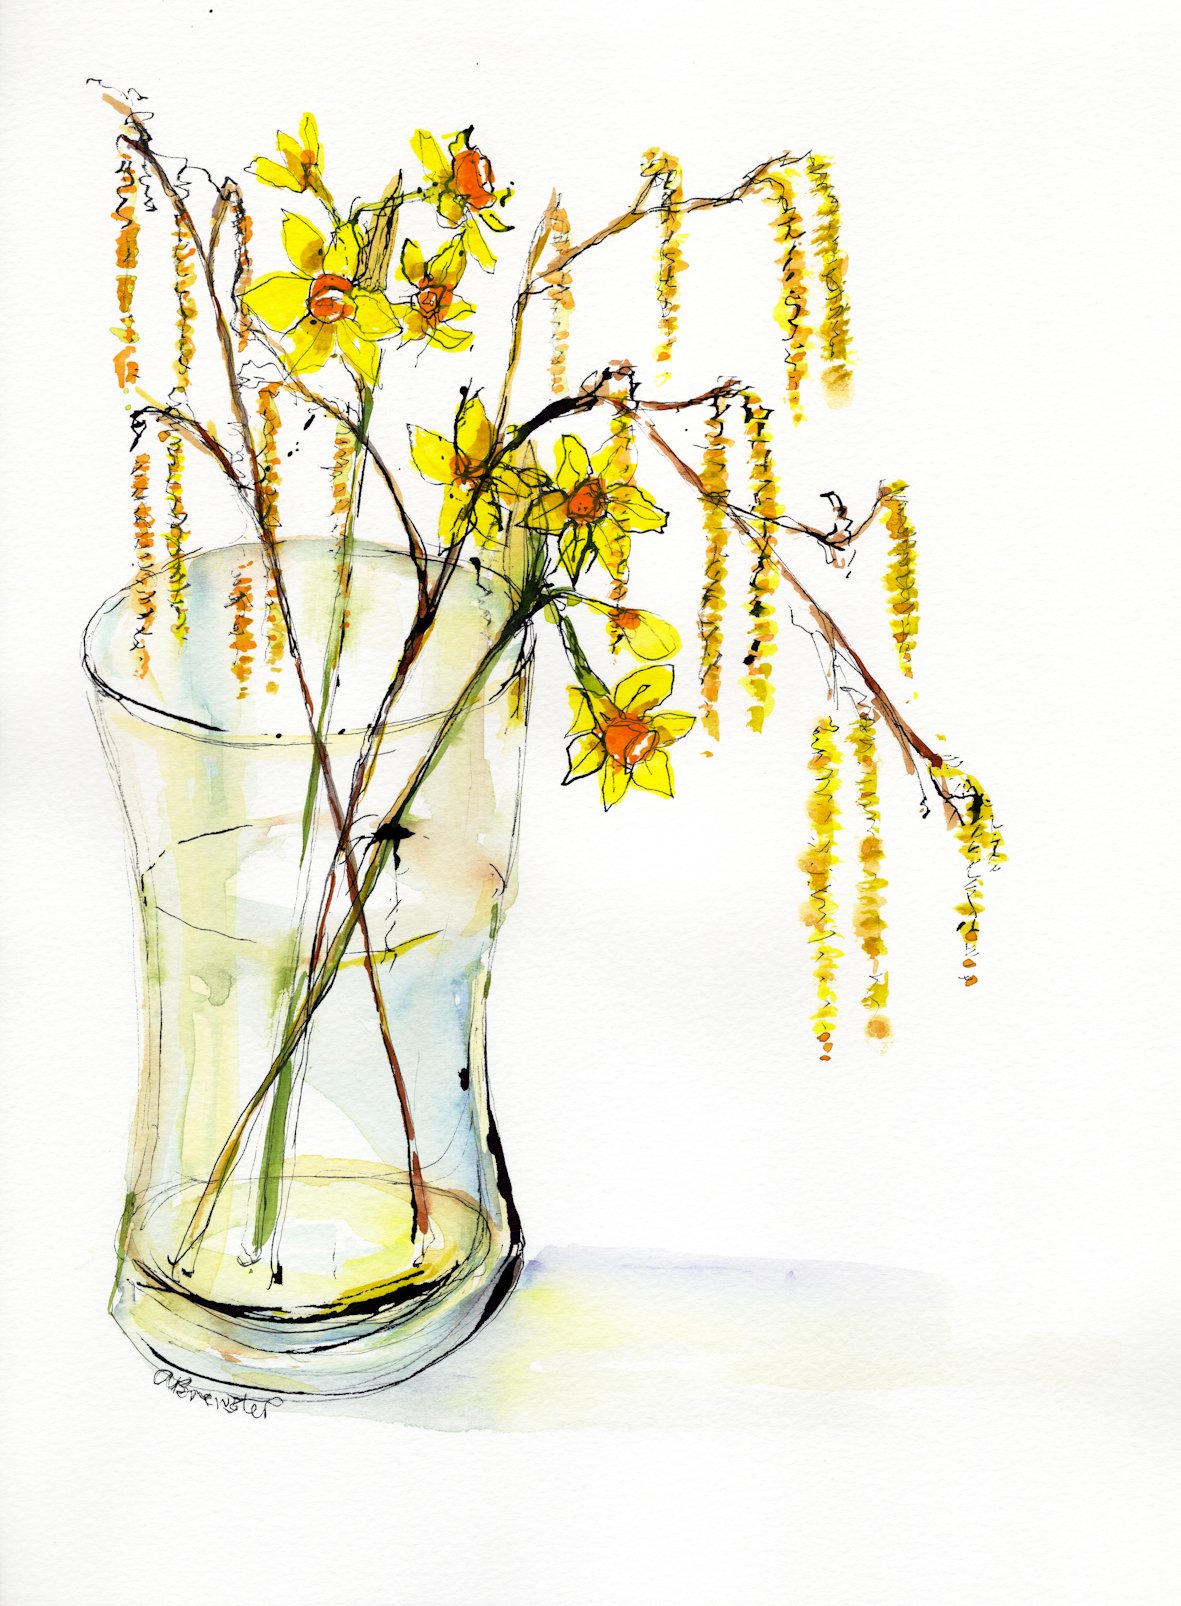
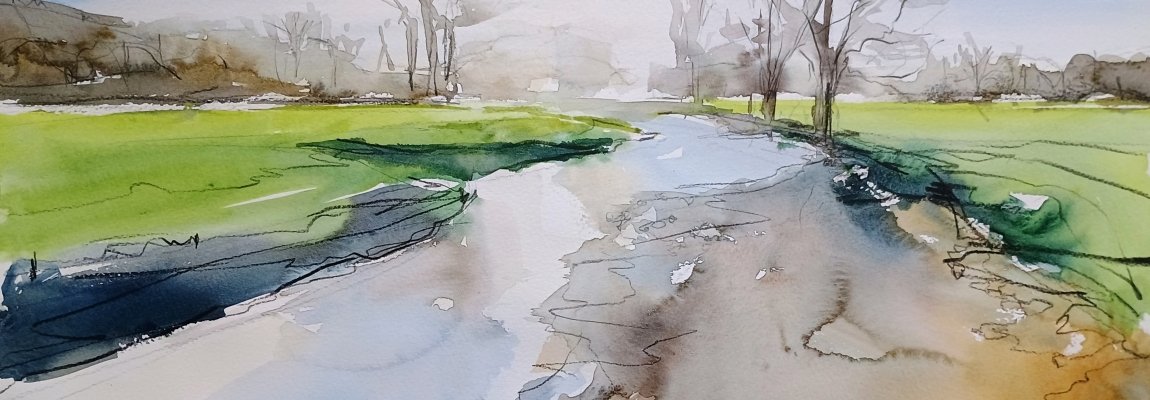
Section of ‘Into the day’, River Coly, Colyton East Devon

Do you ever find that you want to be creative but you stall at the blank sheet of paper?  Know you have it in you but can’t seem to begin?  You are not alone.  Most people who enjoy making art find themselves like this at some point, and it is mega frustrating.  So read on to find out all my best ways to get back into the creative zone with minimum delay!

What is creative flow state?

In a nutshell, it’s that sensation of losing yourself in the moment, dropping out of the everyday and accessing something special and personal to you alone – something that isn’t measured on any clock.  Time slows and becomes meaningless.  All that matters is what you’re focussing on.  And let me tell you, it’s a beautiful, wonderful thing.

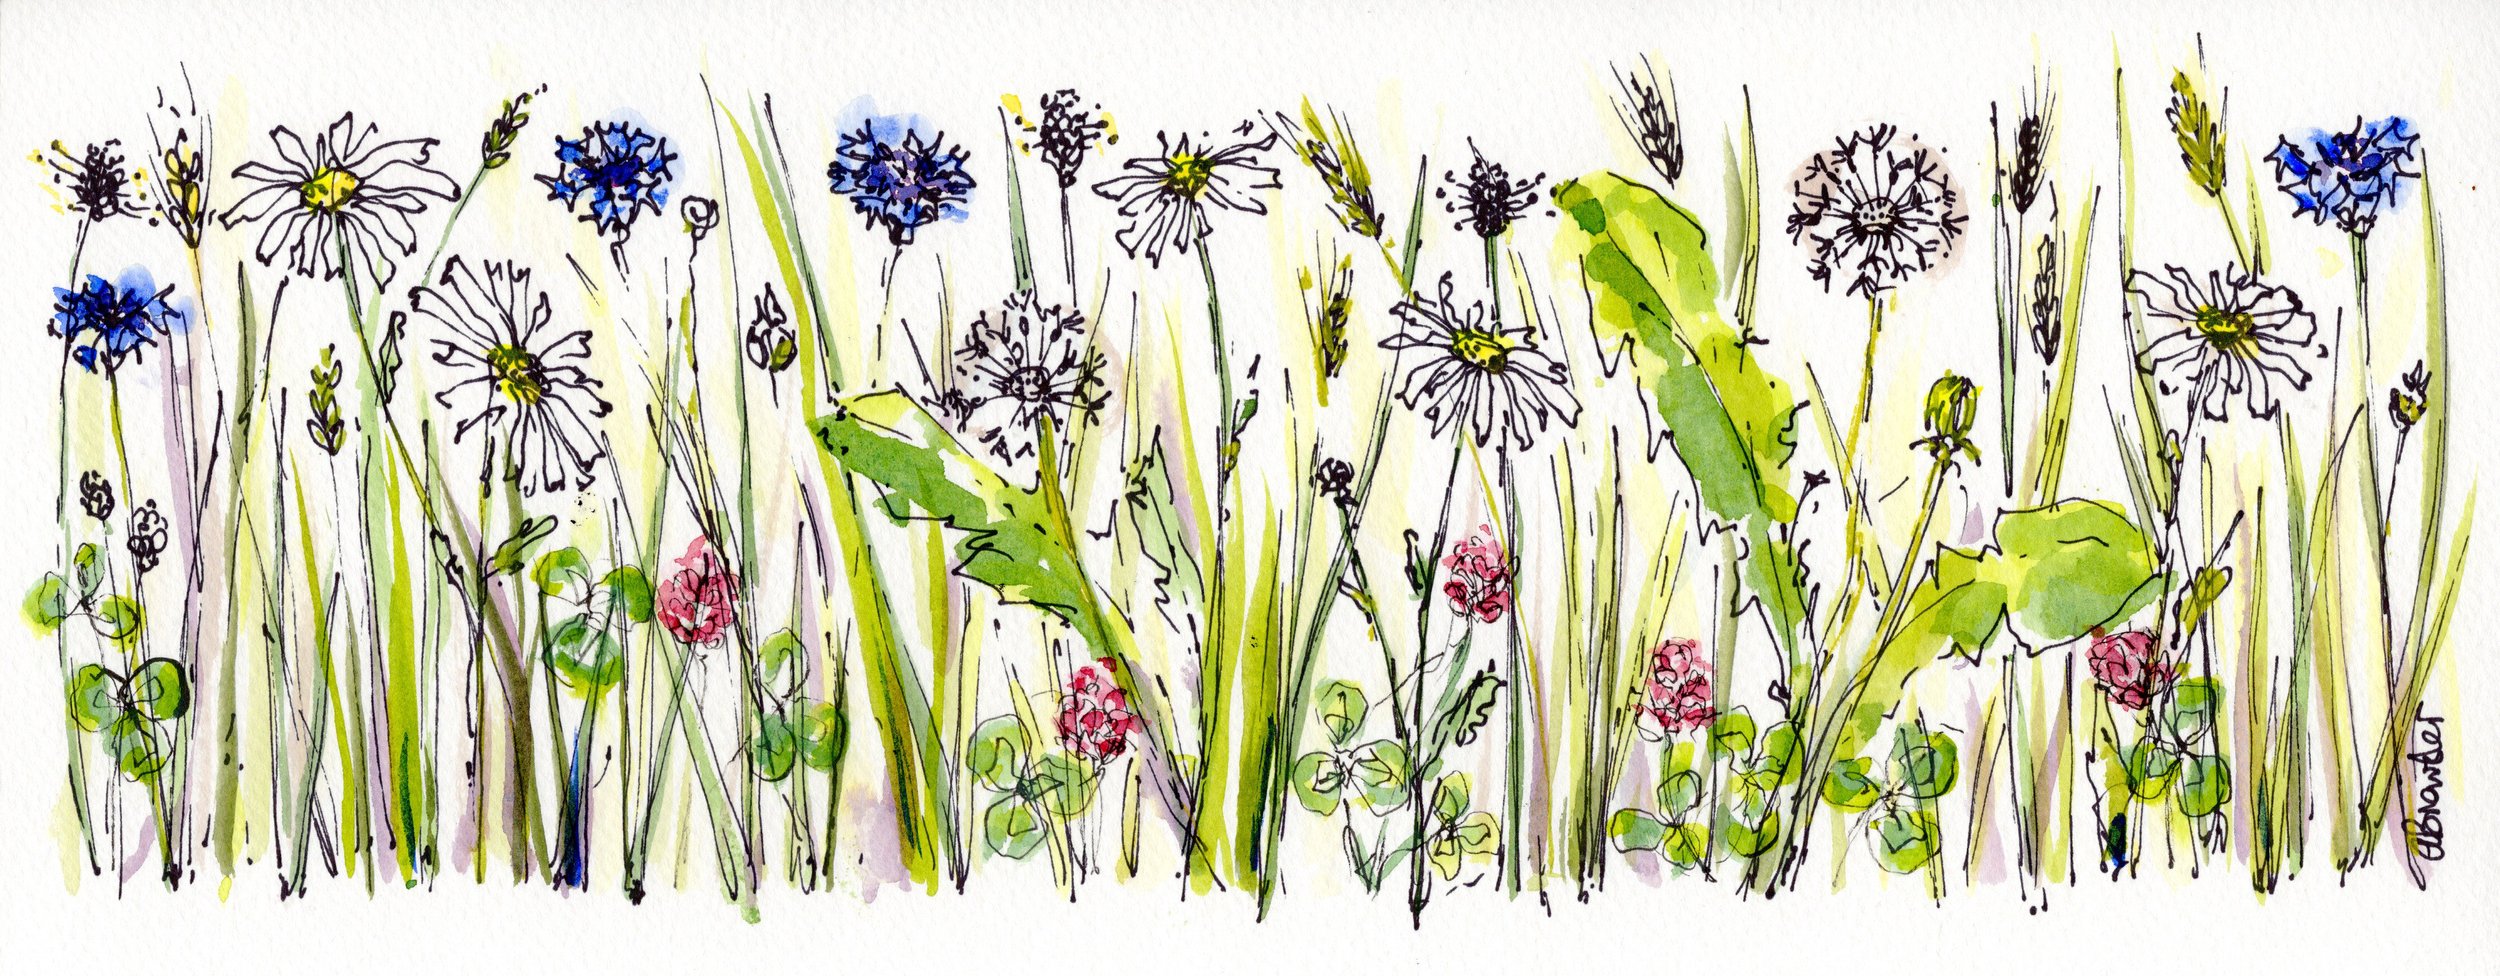
Summer meadow, ink and wash

Why do we need this?

Reflecting on my own art practice, I noticed that I wasn’t leaving room for this slip into creative space, despite doing my best to facilitate that exact same thing for the learners who came to my classes.  Was I less important to myself than they were? 

Perhaps so – or at the very least I had put my own creative flow needs at the bottom of the pile. Let’s face it, it’s such a massive pile in modern life.  Admin, family, home, all the daily stuff that needs to be done. 

Even when I was able to carve out the time to paint I was finding that I couldn’t access that calm, focussed state I needed; it was almost that in setting aside the time I was placing too great an expectation on my own ability to rise to the challenge, immediately drop into creative flow and paint a masterpiece.  No pressure then…

Guess what? You don’t need a fancy studio to get creative.


I’ve been considering this a lot of late, and also reading Wild Places by Robert MacFarlane, in which he describes the change in his own mindset from seeking out the big wild untouched-by-human spaces, to realising that a truly wild space can be small and exist absolutely anywhere, even in the middle of a city. 

This really resonated with me as an artist.  We don’t always need the full day in the big fancy studio.  Sometimes, five minutes with the back of a beer mat and a biro can be just as good for our creativity and by setting our expectations relatively low, we also reduce pressure to perform – which is usually what opens the gates to awesome creative practice.

So, this one is for all the time-poor folks out there who still need, maybe even crave, a little pocket of creative flow.   A toe dipped into the calming waters. 

Here are five of my favourite tried and tested five minute flow boosters!

For those who prefer to draw along/paint along, I’ve even made a video, find it here

1.       The double blind contour draw

  • Grab a drawing implement, maybe a pen - doesn’t matter what.  Tape down a big sheet of paper and close your eyes

  • Pen in dominant hand; find the side of your nose with your other hand’s fingertips. 

  • Start to draw, with your eyes closed, following the contours of your own face.  Keep your pen on the paper.  Keep your eyes closed.  Allow your fingertips to gently move over your own features, recording what you find as lines on your paper. 

  • Breathe slowly, relax into this and draw slowly.  Consider it a mini face massage!

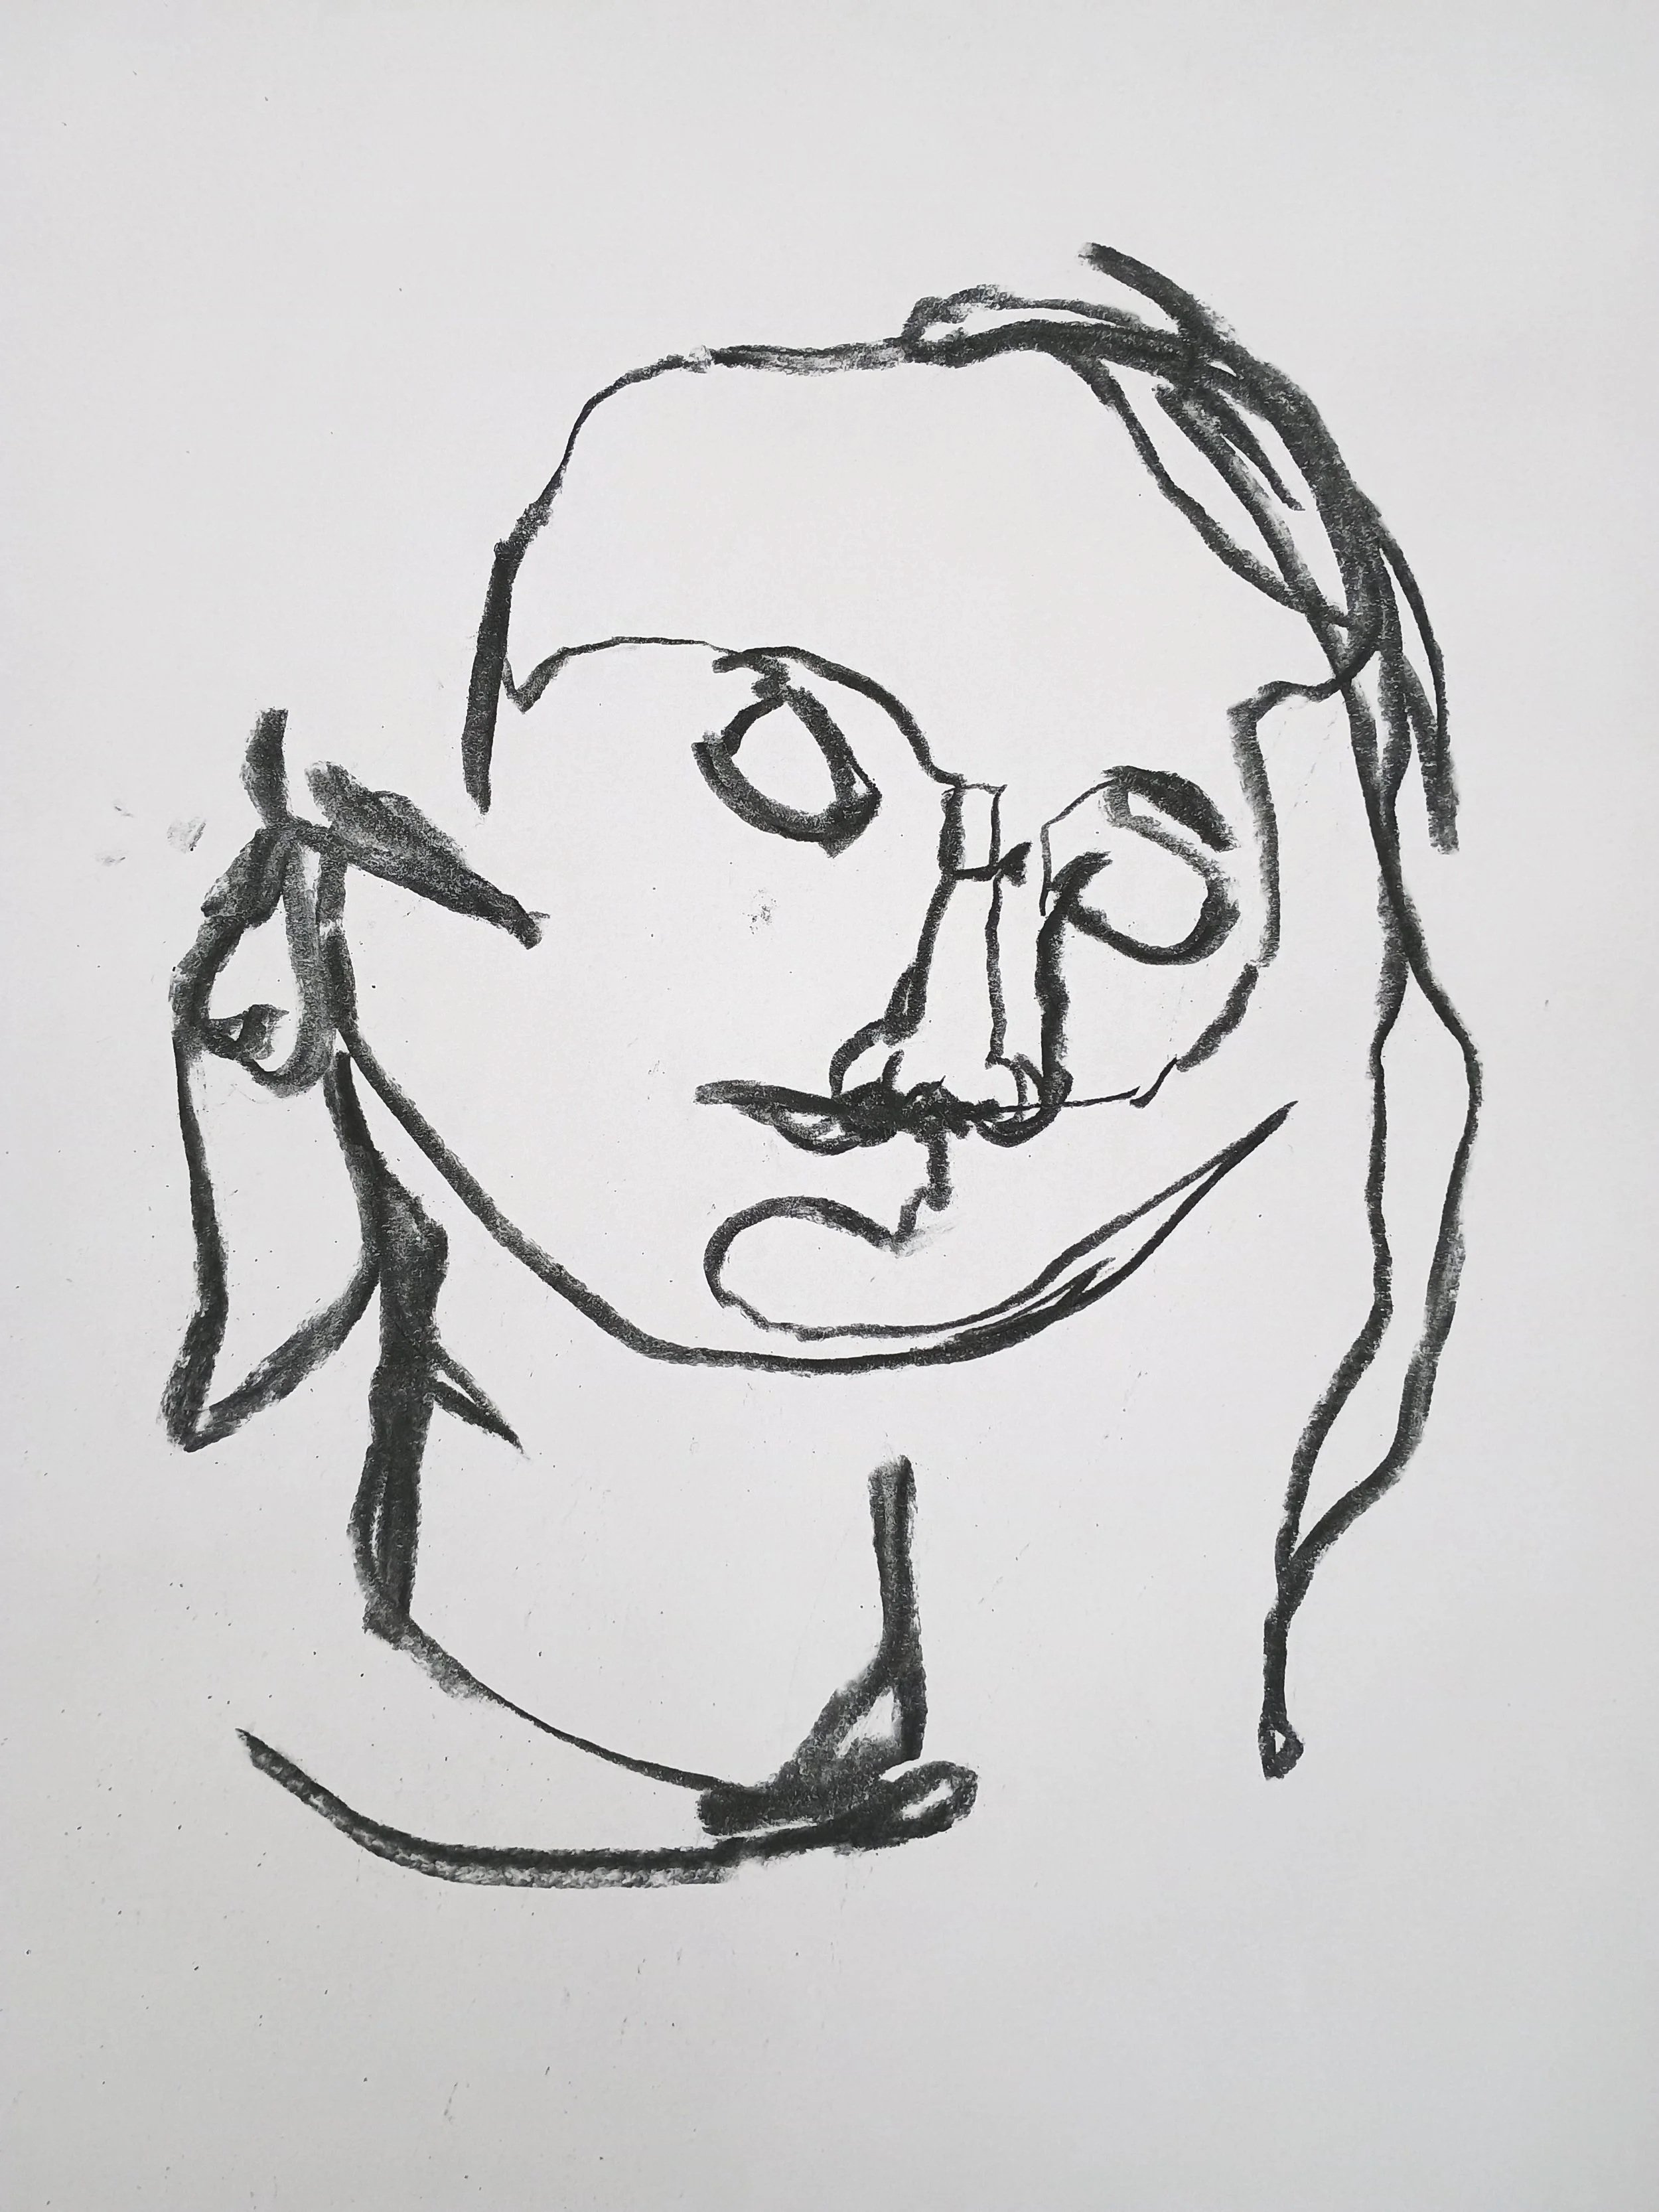
Blind contour drawing example

2.       The continuous line


This is similar to the double blind but incredibly versatile.  The ‘bag drop’ continuous line is a great place to start, just empty the contents of your bag on the table and draw the lot. 

  • Grab a sheet of paper and a drawing tool, again, it doesn’t matter what but ideally something that moves smoothly over the paper. 

  • Take a handful of items out of your bag, say about seven or eight for starters, and lay them across the top of your paper in a line.  It might be easiest if the paper is lying in landscape orientation for this. 

  • Start by drawing a line on to the paper on one side.  Then slowly and peacefully, draw each object as your reach it BUT you must keep your pen on the paper the whole time. 

  • You will end up with a wonky drawing with quite a lot of odd lines in it but just moving slowly along the line until you reach the end is incredibly absorbing and can help that drop into that lovely state of creative flow.

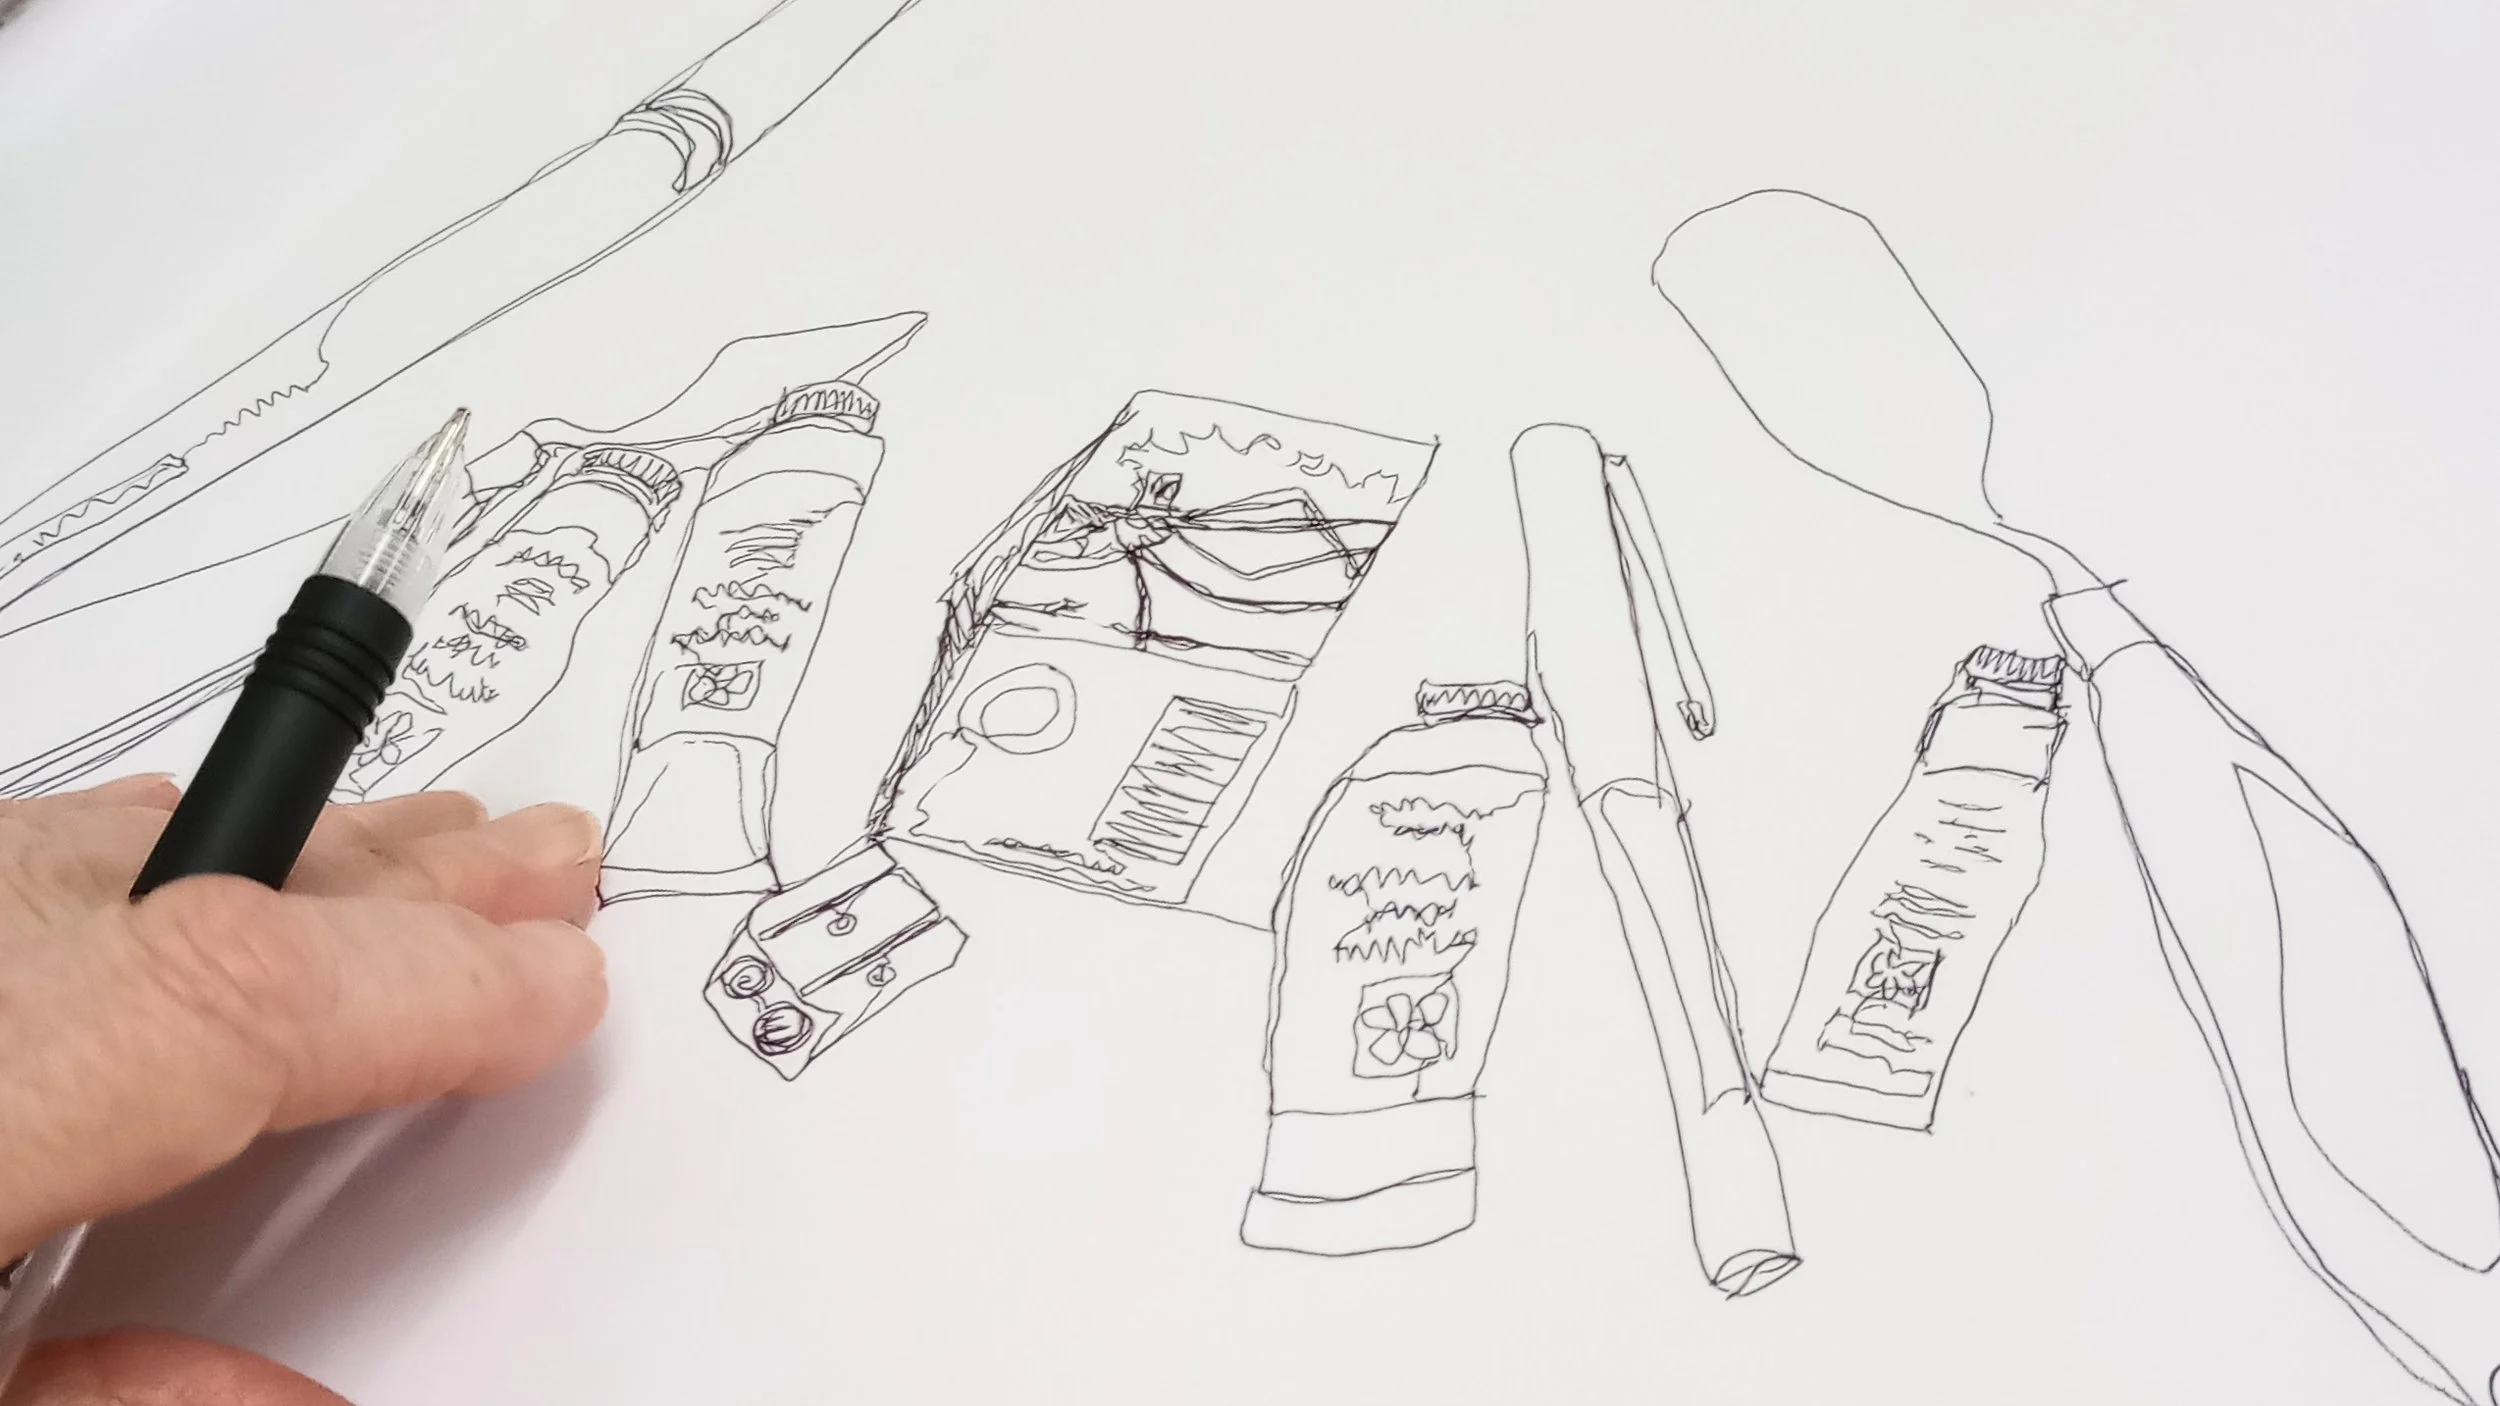
Example of continuous line drawing of art materials by Cathy Badley, at an Art Club session 2024

3.       Ombre circles


This one’s for the painters – any paint works well. 

  • Take two colours of paint, preferably very different to each other.  Say, red and green, or blue and yellow, or red and blue.

  • Grab a nice big brush and a piece of paper.

  • On your paper, paint a circle of one colour, about the size of a large coin.  Sweep round with the brush to form the circle, then infill the middle. You’re aiming to do this all with one lovely generous brushload so don’t skimp on the paint!

  • Add a tiny smidgeon of the other colour to your first colour, just enough to tint it.  Paint another circle.  Add another tiny smidgeon.  Paint another circle. 

  • Keep going until your circles have changed in colour from the first colour to almost the second – then paint one final circle using some clean second colour. 

  • See how many graduations in colour you can achieve.  The more the better!   Try out different colours too.  You might find some combos you love.

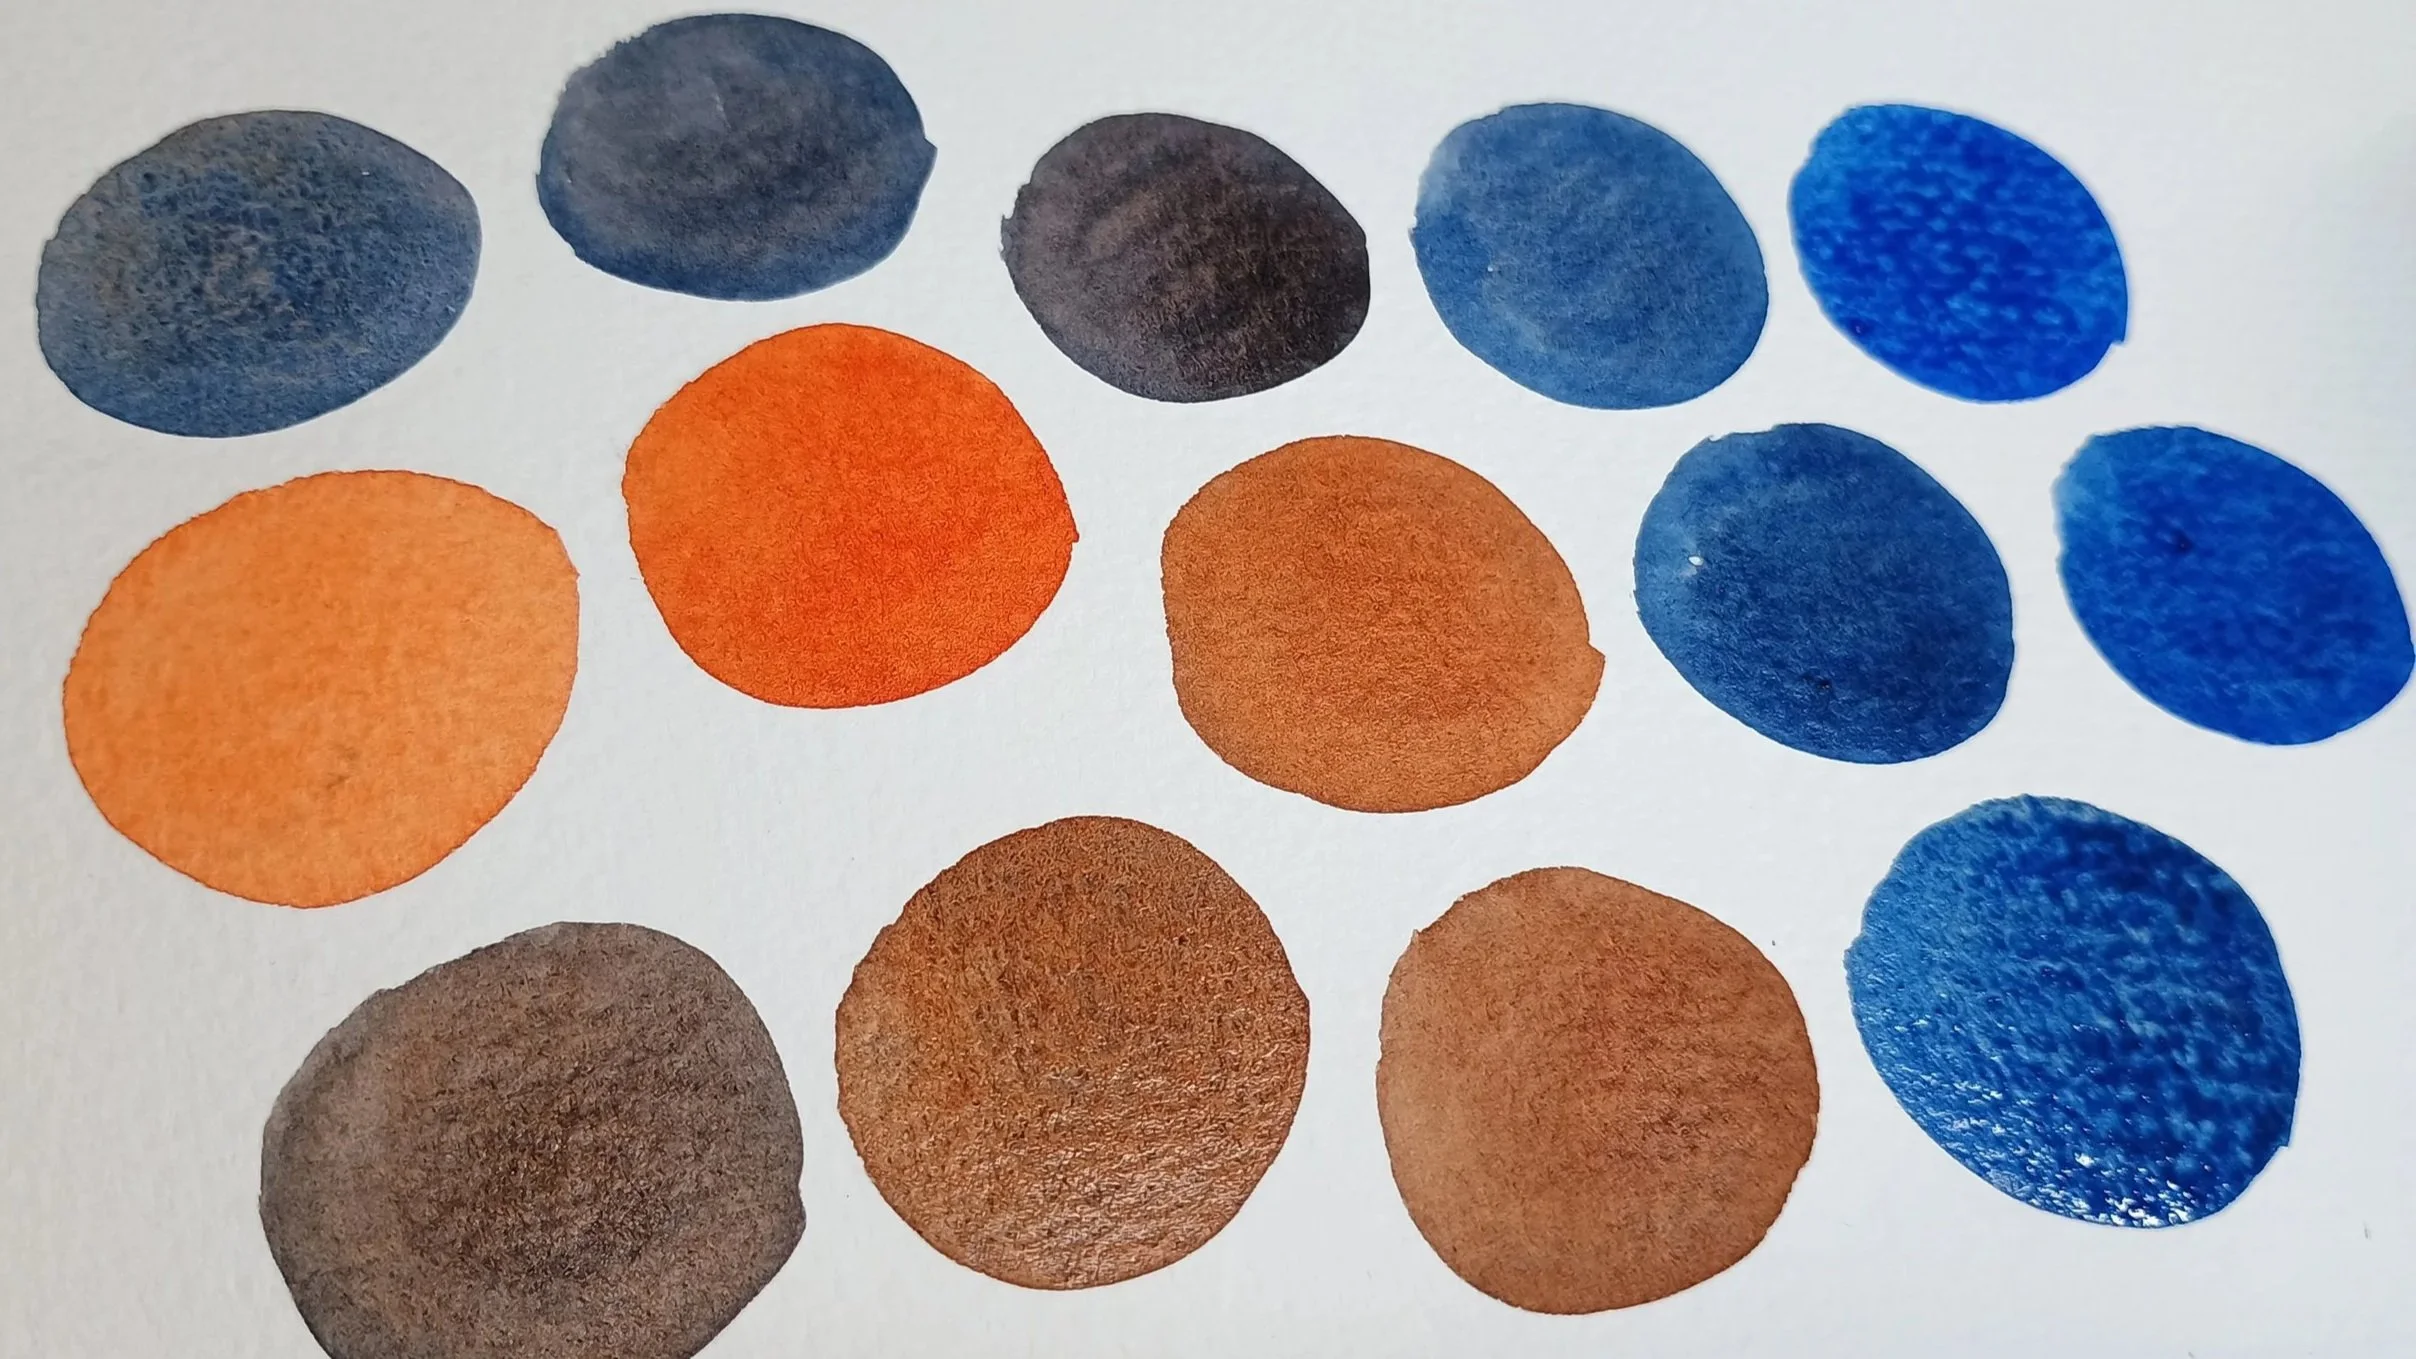
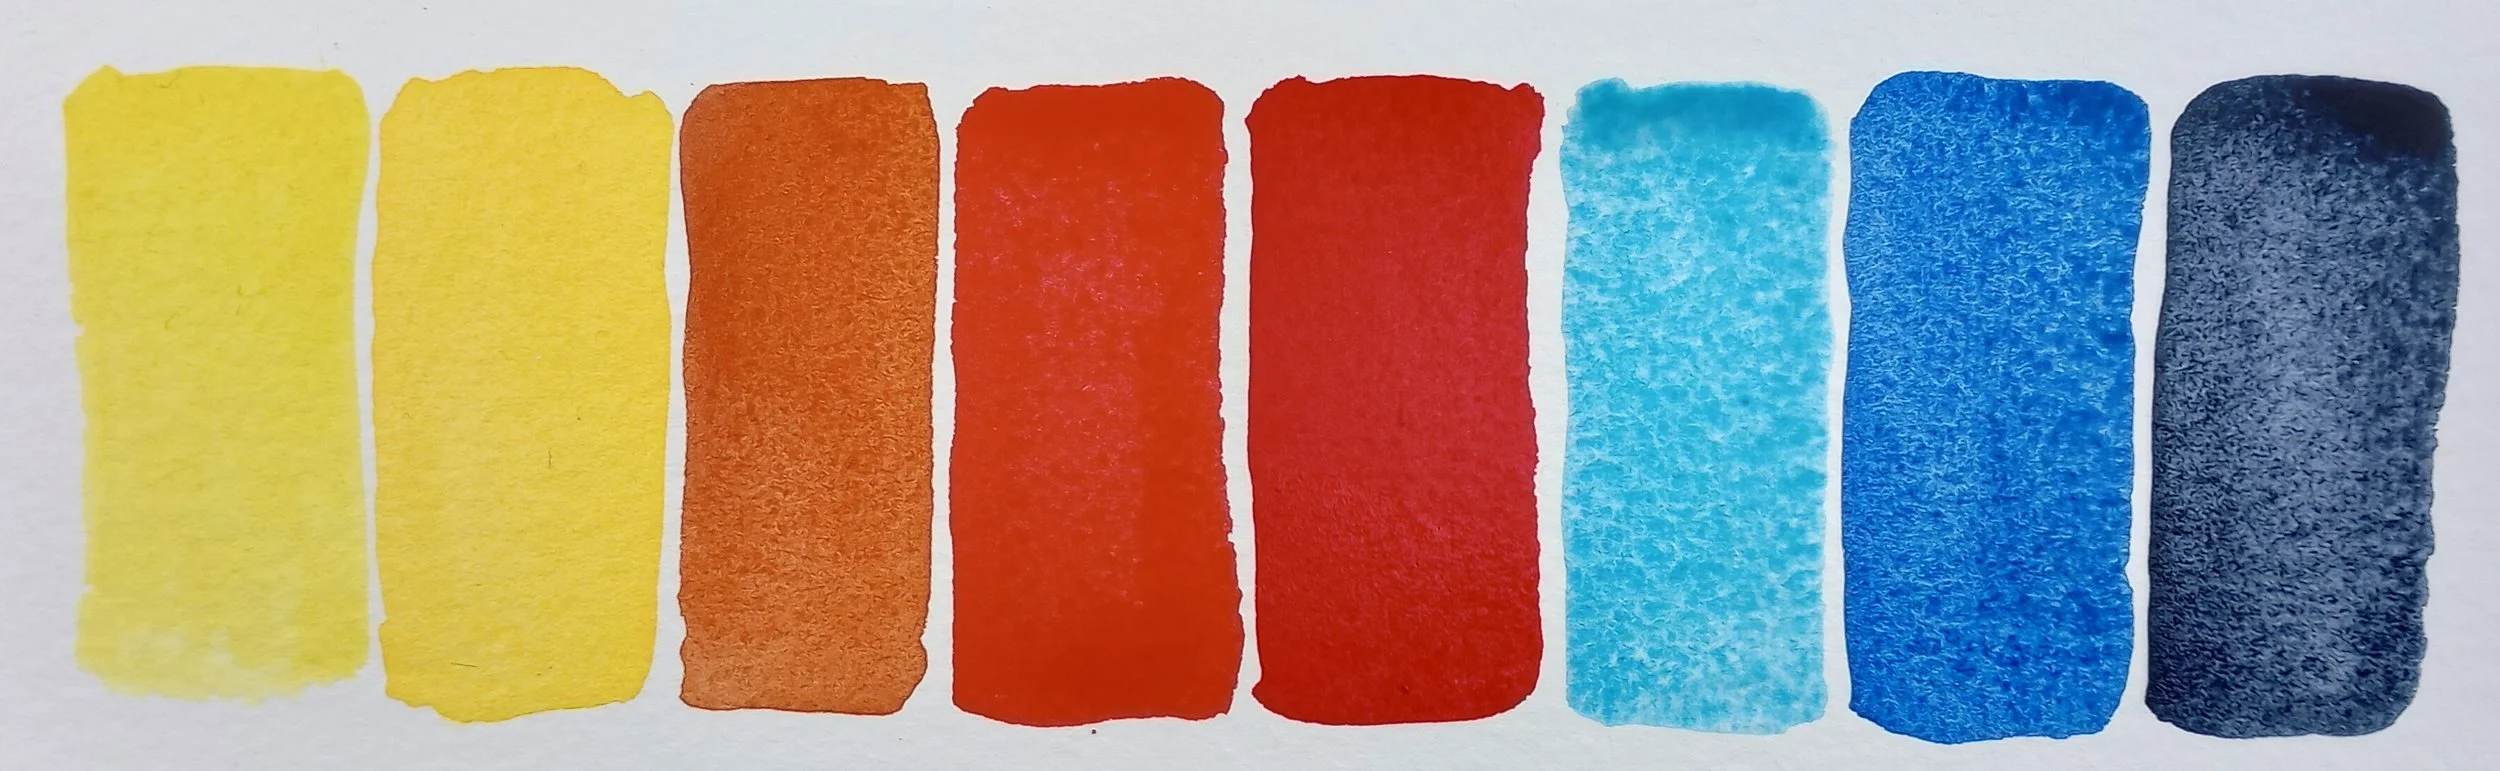
Ombre circles, made with transparent pyrrol orange and french ultramarine blue (both Daniel Smith watercolour paints)

 4.       Colour matching

This works with any media and is really absorbing. 

  • Find a selection of colourful objects. 

  • Get out the media of your choice, some paper and draw a set of little boxes. 

  • Slowly and mindfully, choose an object and consider the basic colour.  Let’s say it is green.  Then what type of green is it?  Olive?  Emerald?  Acid lemony green? A warm green with hints of brown or a cool one with hints of blue?

  • Try and match the colour with your chosen paints/pens/pencils. Once you’re happy with the match, paint in one of the boxes.  If you want to, write next to it how you got that colour.  See?  You’re improving your art practice and finding creative flow all at the same time.  Brilliant!

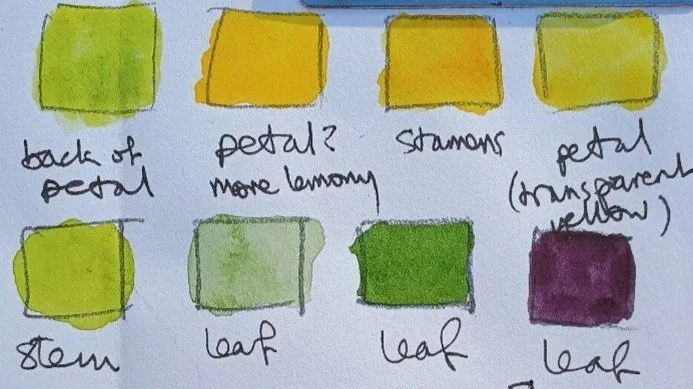
Colour matching with a lesser celandine flower - not just yellow and green!

 5.       Drawing what you’re hearing (or touching, or smelling…)

One for the nature lovers primarily but this works anywhere with any sounds you are hearing.  However, being outside and interacting with nature is great for us human beings so why not combine art and nature for maximum benefit?

  • Take a pen, pencil or set of coloured pencils, paper and something to rest the paper on outdoors or if the weather’s grim just open a window.  Make sure you’ve got somewhere comfy and safe to sit and draw, and this is key, make sure there are birds or other animals or nature sounds nearby – or even urban sounds will do.

  • Relax.  Close your eyes if you’d like to.  Just absorb the sounds around you.  Feel the breeze, or the sun on your face.  Really anchor yourself in this place,  in this moment.

  • When you feel you’ve really put down roots, it’s time to start drawing.  Keep your eyes closed if you want or open them, and try and draw the sounds around you.  It doesn’t matter what they look like.  You’re just observing them and recording them and there is no right or wrong way to do it; just your own way.  It might be that certain colours feel nice for certain birdsong, maybe you prefer drawing shapes and not using colour.

  • Enjoy the connection with nature and your own creativity. For those who prefer to use touch or smell as a guide, try to imagine what things like the fragrance of a rose might look like, or the softness of a dandelion clock!

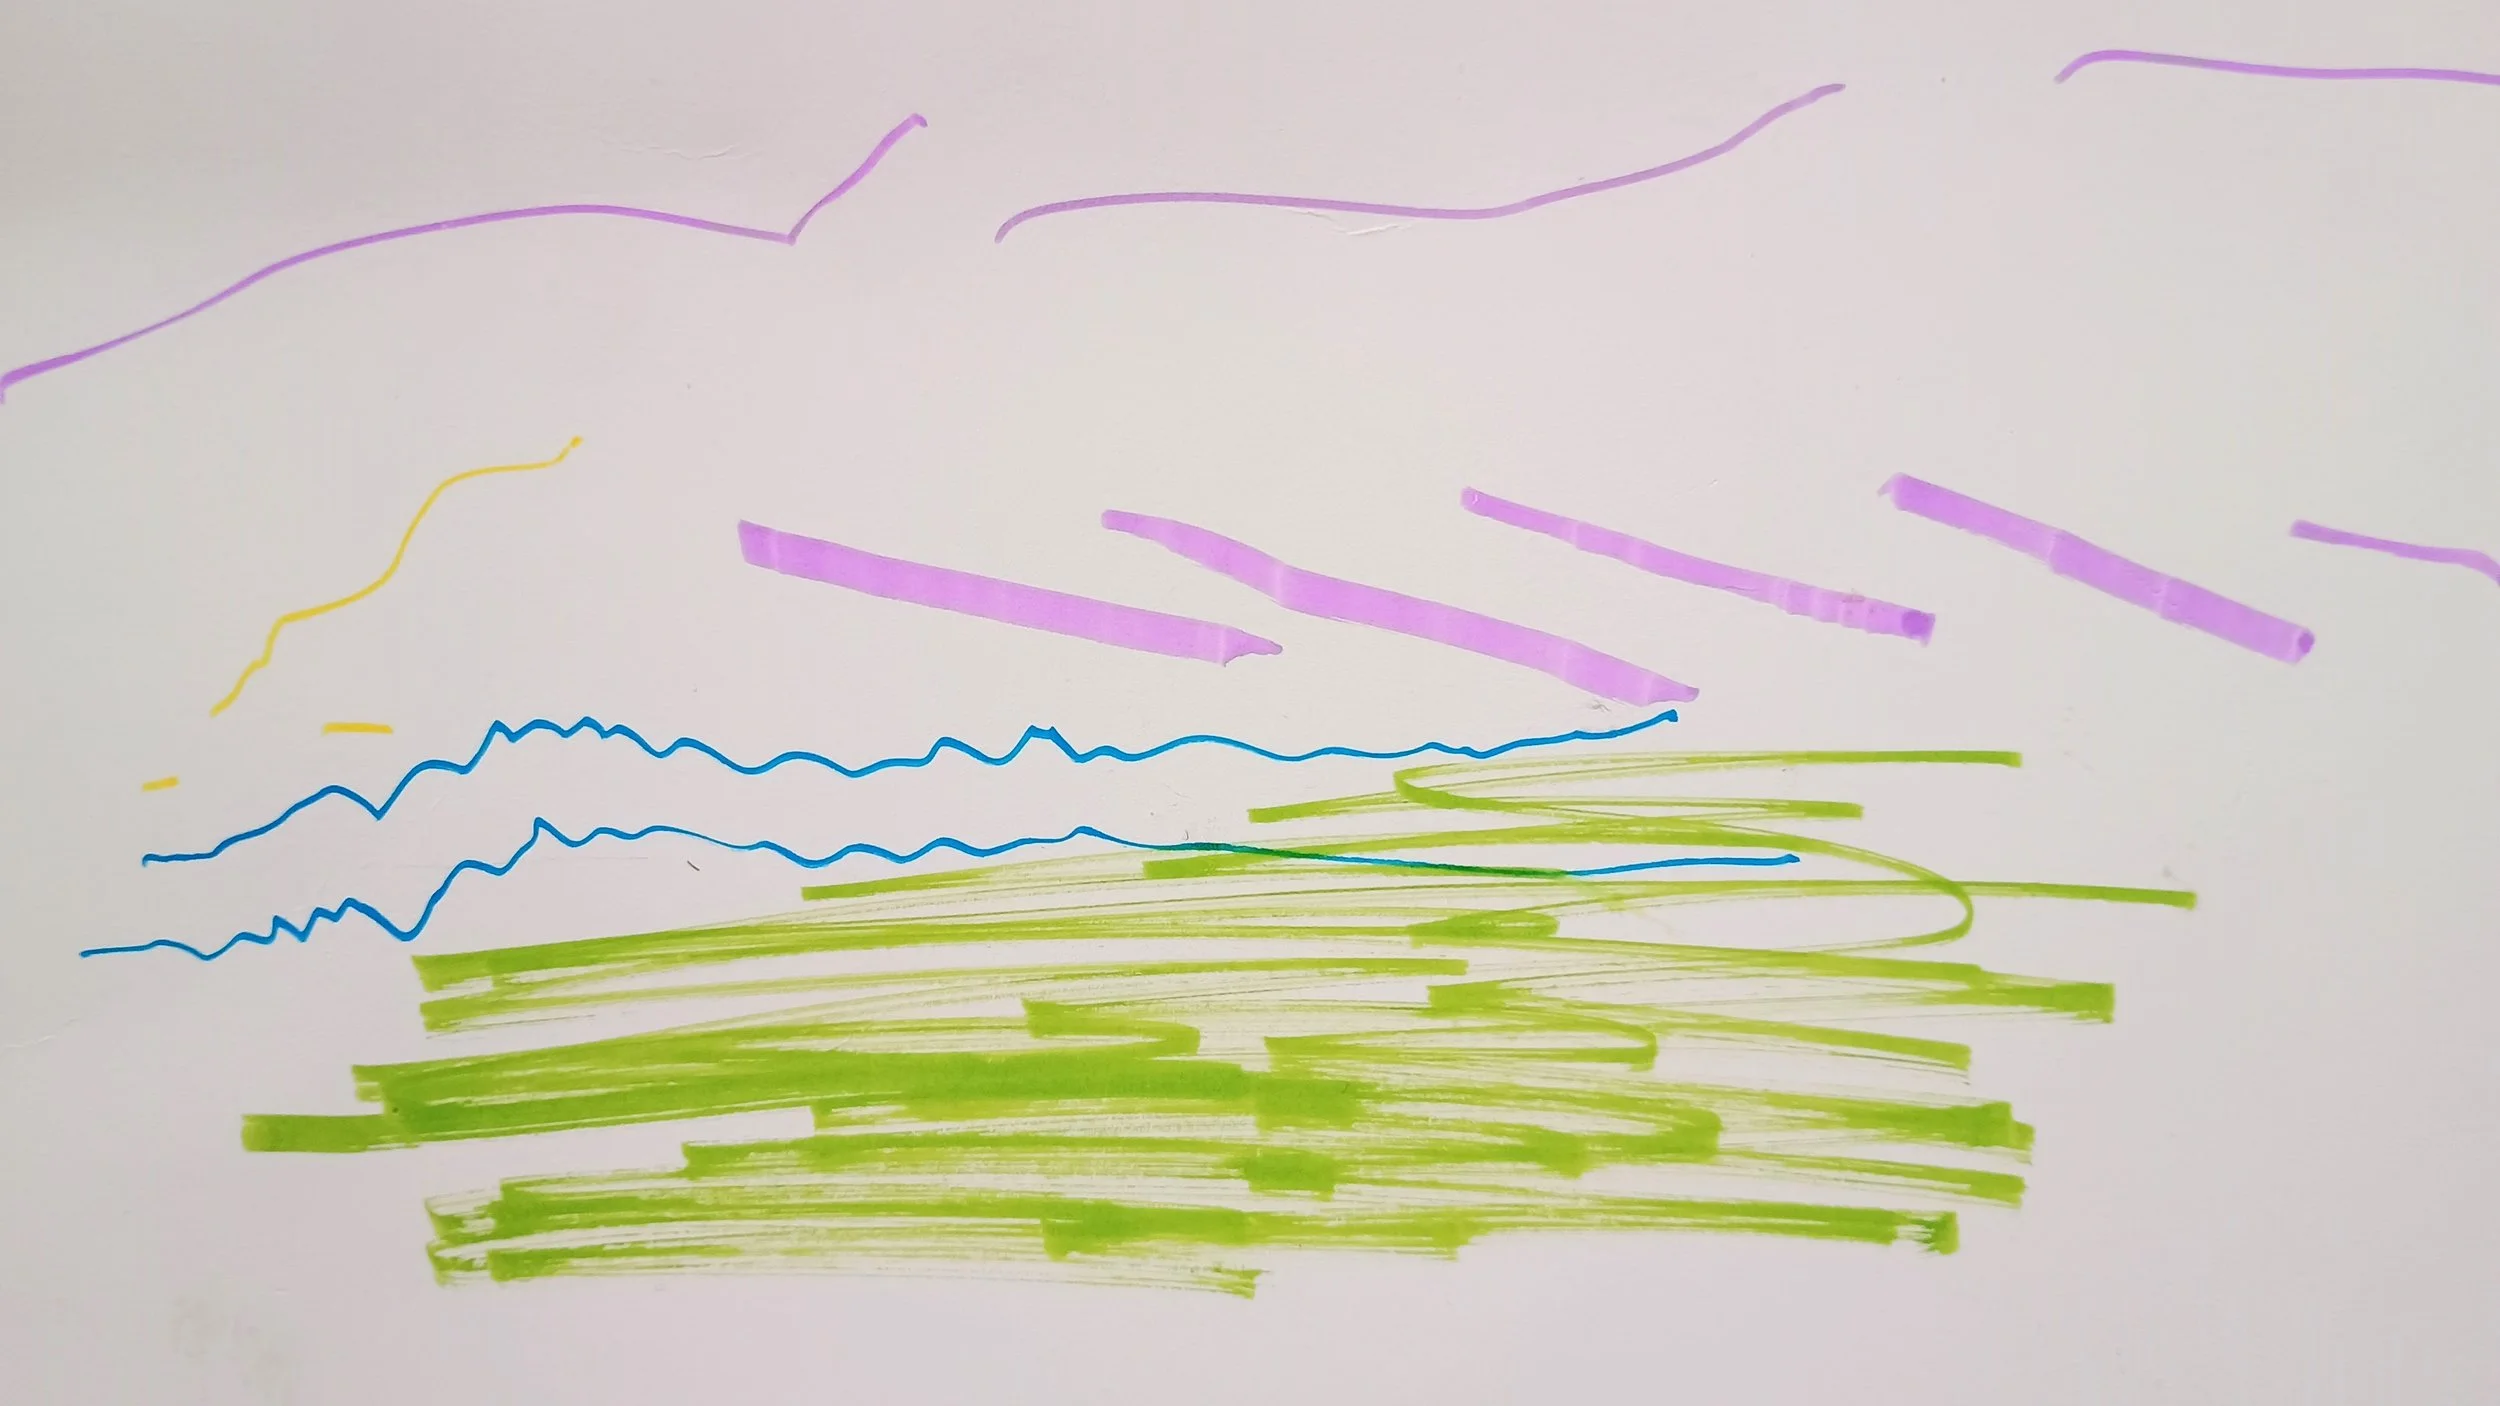
Drawing of various bird songs and wind in the trees

 Enjoyed these?  Why not check out my YouTube channel, which is packed with fun, easy art project videos to try out at home. 

The eight colours you need for your watercolour palette, and why

As an artist and art tutor, I get asked a lot which paints are the best to buy when you’re starting out.  Good quality paint is fairly expensive, and walking into an art shop is a bit like walking into a sweet shop (so much choice!  So many delicious things to buy!) so for watercolour beginners it can be a bit overwhelming.  Which paints will allow me to make a good range of colours?  Which will make a full tonal range of vibrant, bright lights through to rich, deep darks?

Dartmoor views, watercolour and ink by Anna Brewster

Well, good news, people. I’ve done all the research here so you don’t have to.  AND the number of paints you need is probably a lot less than you’d think. 

I’ve spent a lot of time testing, trialling and experimenting with mini-palettes which I give out at workshops, and having worked with a massive range of paints for my own work, I’ve narrowed the key colours down to eight tubes that will set your palette alight and make your paintings full of zing.  


BUT FIRST - hang on, did you say tubes?  Not pans?  

Tubes of watercolour paint are the way to go.  They are broadly comparable in price to the pans, but in terms of performance they are streets ahead.  Simply decant some of the tube into an empty space in your palette and let it dry, then you can top up as needed rather than having to scrape around the bottom of the pan to get the last few dregs out. 

Tube paint is easier to get on to the brush because it is less compacted than pan paint and that in turn makes it much easier to create big washes of colour, for skies and landscapes, for example.

And what about quality?  Are student watercolours okay?

Well, they are okay, and if you’re on a budget, or you love painting MASSIVE artworks that require oodles of paint, then they win hands down over having no paint at all. 

But who wants ‘okay’ when you can have ‘exciting’?  I always advise (for ‘advise’ read ‘frequently rant about’) buying the best quality watercolours you can afford, at least for your key palette colours. 

Cheap paint tends to be chalkier, less transparent, and less pigmented, all of which mean you tend to use more paint in order to get the colours as vibrant as you want them to be, and before you know it the tube is empty.  So basically it’s a false economy; a tube of artist quality watercolour paint might cost a little more, but it will last a really, really long time.  My favourite brands are Winsor and Newton, and Daniel Smith, both of excellent quality.

watercolour painting of a river and autumn leaves by Anna Brewster, East Devon artist

Section of ‘River walk’, watercolour and ink by Anna Brewster

So here, as they are arranged on my palette, are the watercolour paints that can make almost every colour between them, some alternatives, and why I’ve chosen them.  Brace yourself: I am quite passionate about my pigments so it’s going to get a bit poetic!

Ta da! The only paints you’ll ever need (although you’ll probably want more…)

The Amazing, All-Purpose Eight

Lemon yellow

A clear, crisp bright yellow that is really transparent and a great mixer.  Lemon yellow makes delicious zingy greens, vibrant oranges, and has an incredible glow to it that shines from white paper.  Buy a big tube if you can because you’ll use more of this colour than any other.

Cadmium (medium) yellow hue

I dithered over this one because cadmium yellow looks, on the face of it, a lot like lemon yellow but it isn’t.  A richer, buttery warm and slightly opaque yellow, this is the perfect paint for sunsets and autumnal landscapes.  I use it a lot for painting food and flowers as well, it’s sunflower yellow.

Light red

Isn’t light red at all.  It’s more of an earthy terracotta, warm and sun-baked, a versatile paint for landscapes, portraits and the most incredible mixer for seas and skies, teamed with either of the blues in this palette.

Cadmium red (medium) hue / Pyrrol red

A pillar box, stop sign red, slightly leaning towards orange.  This vibrant bold shade has oodles of uses but comes into its own in winter for all those holly berries, baubles and santa pics, although you’ll find it perfect for tulips, roses and all manner of other bright red things throughout the year.  It mixes beautiful browns and oranges with either of our yellows.

Alizarin crimson

A deep ruby red, sumptuous and rich.  Crimson is the colour I go to when I want luxurious, deep purples and mauves, or subtle warm oranges.  Mixed into greens it creates amazing shadow colours, and I’d never be without this mainstay of my palette.  

Cerulean blue / manganese blue hue

The colour of warm summer skies.  You can mix this if you have prussian blue and white but for sheer out of the tube sunshine, this is a great purchase.  I particularly love the Winsor and Newton cerulean or the Daniel Smith Manganese blue hue, the manganese is a bit gritty and textural and the cerulean is smoother so it’s more preference than anything else with these two.

Ultramarine blue / french ultramarine

This is the blue of glass bottles; a warm purple-leaning blue that glows and sings from the paper.  It is very transparent and granulates easily, splitting into fascinating textures as it dries when mixed with other paints.  Wonderful greens and purples can be mixed with ultramarine and of all the colours in my palette this might just be my favourite!

Indigo

Bringer of deep, dark blues, creator of shadows and depth, indigo is a workhorse of a colour, so dark on the palette that it could be mistaken for black.  Indeed, you’d hardly know it existed because it’s so understated but it’s probably the most versatile colour on my palette.  It’s only when you swirl in some water that it is truly revealed - the colour of bruised skies and thunderclouds, dusk falling.  Indigo is an ancient colour and I love it for that reason alone.

But wait: where are the greens?  The browns?  

Oooo. That duck egg blue is something else. These colours can all be mixed with the palette I’ve listed.

With these eight tubes you can mix almost anything.  I almost included yellow ochre (soft gold opaque paint that is great for portraits and landscapes) but it’s possible to mix a close-enough version of it with cadmium yellow and light red.  Burnt umber (deep brown) didn’t make the cut because you can mix it with indigo and a smidge of yellow and red.  And greens?  Well, with two yellows and three blues the world is your oyster and all the more interesting for it.  

So here’s the final shopping list:

  1. Lemon yellow

  2. Cadmium (medium) yellow hue 

  3. Light red

  4. Cadmium (medium) red hue

  5. Alizarin crimson

  6. Cerulean blue / Manganese blue hue

  7. Ultramarine Blue / French ultramarine

  8. Indigo

If you’re getting a birthday or seasonal gift for a creative person, you can be sure that this collection will put a big smile on their face - and if you’re shopping for yourself then well done, you’re getting exactly what you need to make great progress with your painting!

And if you need a smidge of further inspiration to get started on your art journey, why not check out my YouTube channel? It’s filled with art mini-projects to inspire your creativity, with a new project added each month.

Artists out there, what colours would you choose?  I’d love to hear about your go-to favourite paints.

Why are watercolours so scary to paint with?

It’s a good question and when I started painting, thankfully not one I thought to ask because by happy chance they were the first medium I painted with. Coming from a position of enthusiastic ignorance I just grabbed a brush and got on with it! That was a while ago and although I paint and draw using many different mediums I’ve never lost that enthusiasm for what watercolour can bring to a painting.

So why are watercolours scary to paint with? Read on to find out how to solve some of the most common problems that cause artists to shy away from this wonderful medium.

granny’s roses, watercolour and ink

My painting has ended up all muddy and dull colours!

This is a common complaint, and the reason watercolour paintings can end up muddy is because each layer of paint you add to your work has to be applied with a degree of caution. If the paint underneath is still damp, the colours will mix together and create a murky colour you probably didn’t want. A little patience and leaving that first layer to dry will ensure you can create clear and bright layers rather than mud. Also choose your colours carefully - transparent colours tend to be easier to mix in my view, and less prone to going muddy. And there is another common reason for dull colours, which leads us on to….

Orange tulips, watercolour and ink

The paints are very expensive for such tiny tubes!

Don’t be fooled. That tiny tube might be pricey, but it is like Dr Who’s tardis (UK readers only?!) I’ve got a 15ml tube of indigo paint that I’ve had for about three years now and I use indigo all the time.

It gets said a lot, but it’s the most useful advice I’ve ever been given so here it is again: use the best paints you can afford - artist quality if possible, at least for the colours you use most often. These are richer in pigment, last much longer, and crucially, you only need a tiny bit on the wet brush to create a big juicy layer of colour, so there’s no reloading the brush mid-way or scrubbing away at the paint pan to get the pigment you need.

I’ve had student paints. The colours were dull and my brushes ended up blunt because of all the scrubbing. Now I use artist quality paints which I decant from the tubes into my palette and allow to dry before I use them. This gives me rich, gorgeous colours and is very economical, plus you can share colours with other artists easily - I love finding out which colours other people enjoy using.

Time to clean my palette…

I can’t paint over my mistake!

Acrylics and oils all have their own challenges, but what they excel at is allowing the artist to either wipe off unwanted areas of paint, or once dry, cover the mistake completely with a fresh layer. Watercolour is certainly less forgiving in this respect as once it’s on the paper it’s basically a permanent feature. Some watercolours can be gently lifted off with a clean wet brush and a soft cloth or tissue to blot with but any of the more staining ones like ultramarine blue are unlikely to budge.

This is good and bad in equal measure. Yes, it’s super-annoying when you make a blunder and can’t wipe it off. On the other hand, I find it much easier to create a fresh, lively painting in watercolour because I’m not waiting days or weeks for paint to dry between layers.

Embracing mistakes and going with the flow is part of being a watercolourist because as any artist will tell you, watercolours have a mind of their own. Sometimes the mistakes end up being the most interesting bits, which is joyful. Sometimes the whole lot goes in the bin. That is not so joyful but learning to roll with it is a valuable lesson; once I’ve stopped grumping about the wasted paper I try to find something to learn from the mistake so that the paper isn’t actually wasted.

Oh, and you can always just flip it over and use the other side…


I got carried away and covered the whole sheet of paper with paint. How do I put the white highlights back in?

This one is probably the number one problem experienced by artists who are starting out in watercolour. In acrylics or oils you have the option to add your brights and lights at any point but many painters like to put them in right at the end, over the top of all the other layers, all sparkly and zingy.

That ain’t gonna work with watercolour. Flipping the process around takes some practice but the goal here is to leave the highlights of the painting - those bright areas of sparkle on the sea, for example - white from the very beginning.

Instead of painting on the highlights at the end, thinking about them before you begin is critical. If you can do it, leave blank areas of paper where those highlights will be. If you think you can’t be trusted not to cover the whole paper in paint, there is a plan B - use masking fluid or white crayon to pop those highlights in as waterproof areas before you start sloshing paint. If this all goes wrong, plan C is to get a tube of white gouache paint, which is opaque and chalky. You can add highlights in at the end with this but it requires a gentle touch, otherwise it can look a bit like Tipp-Ex.

gariguette strawberries, ink and watercolour

I put loads of paint on and it’s all dry but my paper has gone all wobbly.

This is easily fixed. Paper or cotton watercolour sheets ‘cockle’ when wet. A bit like clothes shrinking the first time you wash them as the fibres move and tighten up. You can prep in advance and tape them to a board, wet them all over and let them dry before you use them, OR you can do what I do because I am never that organised.

Wait until your painting is completely dry, lightly wet the entire back of the paper with a paintbrush or sponge, and then flatten your work of art between a couple of boards. I usually add a sheet of greaseproof paper on the painted side and kitchen roll on the wet side. Once the paper is dry the painting should be flat. If you are worried about this method, try it out with a painting that went wrong first!

If you’ve never tried watercolours, why not give them a go?

They might have their character flaws but the colours can be amazing; transparent and glowing in a way that’s unique to the medium. The way the paint settles into the dimples in the paper, the transparency that lets the light glow through.

I still get excited when I dip my brush into the unassuming little pan of paint on my palette and paint a tidal wave of glorious pigment on to the paper. They are apparently the hardest medium to forge, which would make sense given they’re never 100% controllable.

But that’s ok. If they were 100% controllable, how would anything magical or unexpected happen? And that in a nutshell is what makes watercolours so fantastic to work with.

new year, new work!

painting of bouquet of catkins and narcissi in a vase

catkins and narcissi II

bringing the zing

New Year, eh? That time of making ridiculous vows like not eating cake, going for massive runs, etc etc…well, I’ve made one of those daft resolutions, only with painting. Each month in 2022, I will be creating nine new paintings and offering them up for sale via folksy on the last day of the month, each month.

This sounded quite manageable until I did the maths and worked out it was a hundred and eight paintings in 2022. Phew! But then again, a hundred and eight opportunities to do something I really love doing - how great is that?

So we are kicking off the New Year with a haul of wintery sunshine blooms and winter veg, and my goodness, how much I have enjoyed splashing yellow and purple ink ALL OVER the place, bringing the zing into our little studio in Colyton, raiding my hedge for these wonderful catkins. If you should purchase this particular painting, the catkin pollen is a extra free gift as it got all over the painting in clouds every time I accidentally nudged the vase of flowers…you’re welcome.

finding the colour

For these paintings, I’m using either deepest black india ink or dark grey acrylic ink to make the bones of the drawing, all drawn with a handmade reed dip pen.

Once I have the structure of the painting down, I create a palette of vibrant acrylic inks and then start bringing the whole thing to life, with a really big brush to stop everything getting too fussy. Sometimes it feels to me like if you blink you miss things like the catkins, or the first snowdrops - these little moments of enjoyment. So for me it feels right to be drawing them in this loose, quick way before they have a chance to change.

The inks I use are super bright and colourful but recently one of the other artists I share a studio with has taken to hand-making inks from natural ingredients - I can’t wait to try some of them out because the colours are incredible, earthy and warm and full of texture.

february flowers

As February is about to begin, I’m already looking round for my next nine subjects. Got a favourite Spring bloom? Anything interesting coming up in your garden or veg patch? Do let me know, it might just end up in February’s nine.

Sketching by the sea, Spring 2021

Over the last year, I’ve spent quite a lot of time staying local (no surprise there then) and for me, local means the beach and the coast paths around here in Sidmouth.

There’s a time of day known as ‘golden hour’ in the evening when the land gets that beautiful glow all over, the sun is just setting and the shadows are really long - it is beloved of photographers everywhere and with good reason, and we painters are quite partial to it as well.

Read More